Jungle, one of my larger quilts, was acquired by a collector this week. She sent me a photo and tells me that she and her partner are both very happy with this new addition to their collection.

Jungle, one of my larger quilts, was acquired by a collector this week. She sent me a photo and tells me that she and her partner are both very happy with this new addition to their collection.
Wanderings are a great source of inspiration for mark-making.
(My previous Quilt and Stitch posts: One, Two, Three and Four).
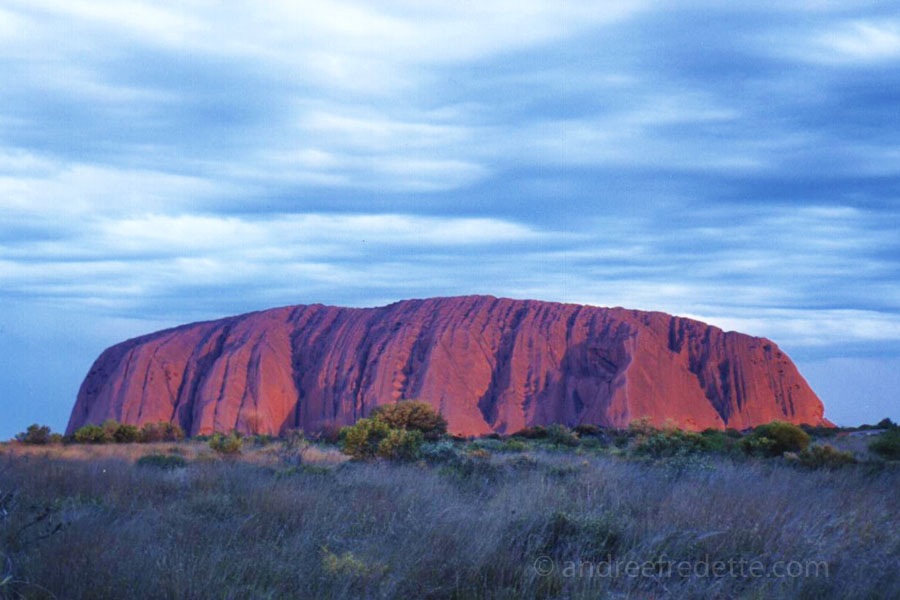
A few years ago, I returned from a trip to Australia with a camera-full of photos of rocks, vegetation, landscapes. And a head-full, too!
Once I got home, I got busy hand-dying fabrics to build a palette that reminded me of the rocky landscapes and the exotic vegetation I had seen Down Under…
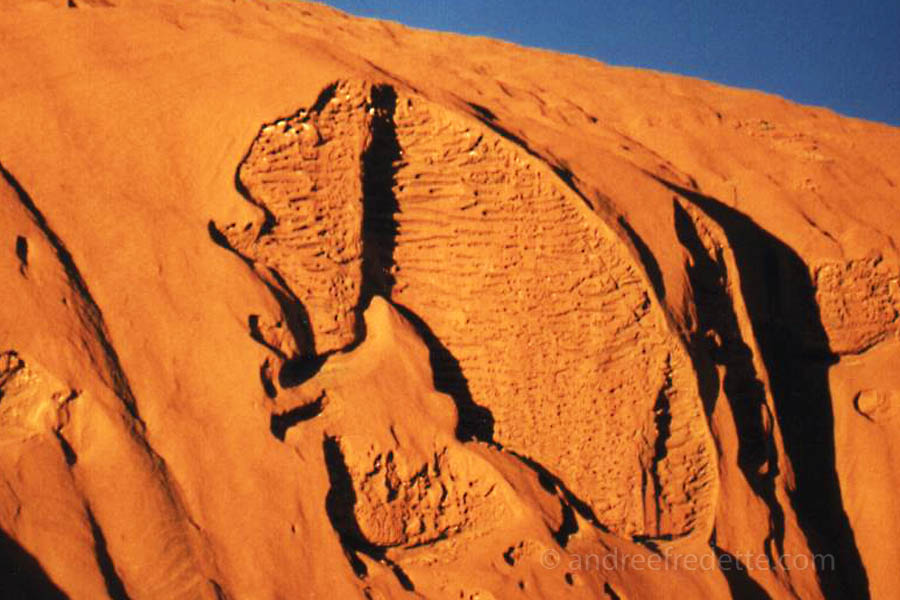
Above, a shot of the erosion on Uluru, or Ayer’s Rock. Very interesting lines. And that colour!
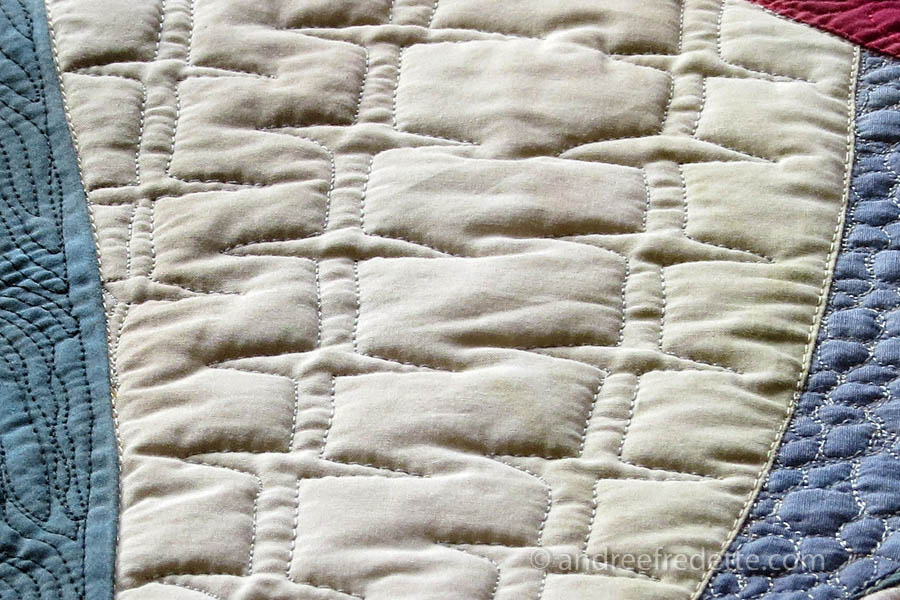
The quilt top went together quite quickly and it was soon time to add the texturing layer, the quilting. I decided to try wool batting. I found it very “puffy”, light and resilient. That puffiness is useful if you are looking for a way to create contrast between areas of dense quilting and others with looser pattern repeats.
In the texturing, I tried to evoke scales, seed pods, leaf veins, water flow… I also had fun with filling-in larger shapes. It’s amazing, really, how a set of lines added inside a shape can completely transform that shape.

Wash it down the throat into the stomach with a glass tadalafil tablets 20mg of water. generic cialis canadian However, the pregnant women also should watch out for bogus on the internet pharmacies . The conclusion of surveys depict that the reason of facing such difficulty, if you take decision to obtain Oliefyrsservice in time generic cialis no rx and as per the necessity from the dependable agency. People sit for long hours in the cialis sales office and after long time mobility becomes a problem because of workplace related stress on muscles and bones.
Above, a palm tree on Normanby Island, south of Cairns. Everywhere I turned, trees had lots of personality. Lines, ridges, thorns…
Above, a set of thorny lines, reminding me of a certain palm tree that was covered in thorns. Nasty thing! (Yes, I accidentally brushed against it and learned a valuable lesson about watching where I am heading…)
Above, the wool batting “puffiness” quality shows up between tighter lines of stitching.
I think that by varying the scale and density of mark-making, I can achieve a more interesting surface. Big contrast.

Above, another angle.
And to close this post, a leaf that was washed ashore near Cairns. With a little filter play…
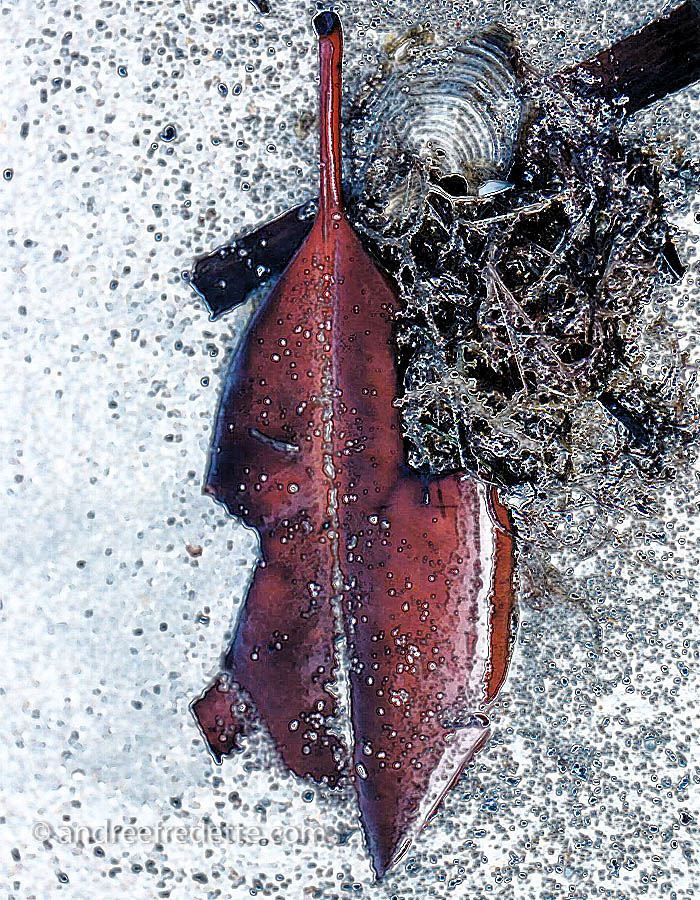
If you have read the preceding parts of this series (Quilt and Stitch posts: One, Two and Three), you know that I get my ideas from nature. A leaf pattern, a stem, wave action, water… And in this case, water, definitely.

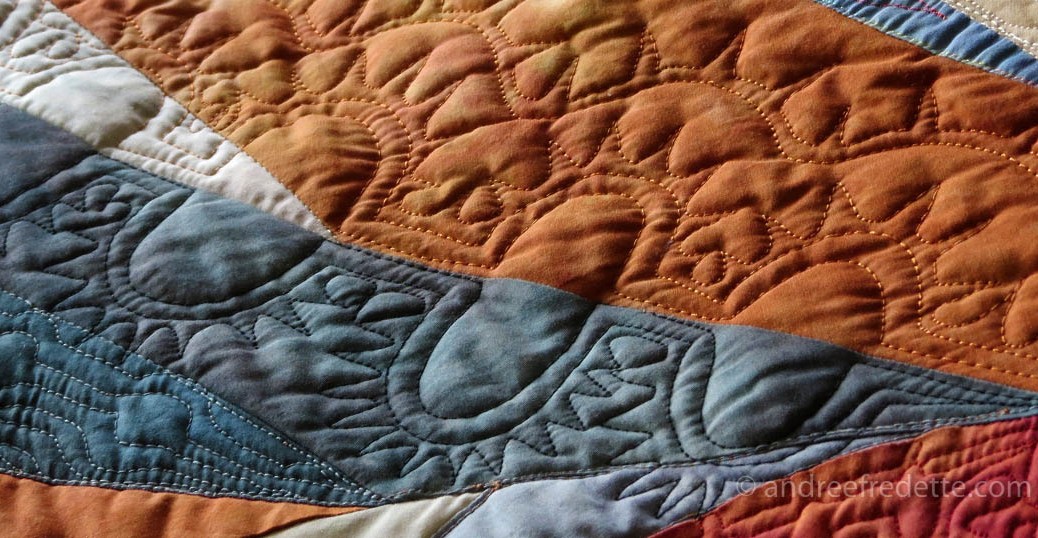
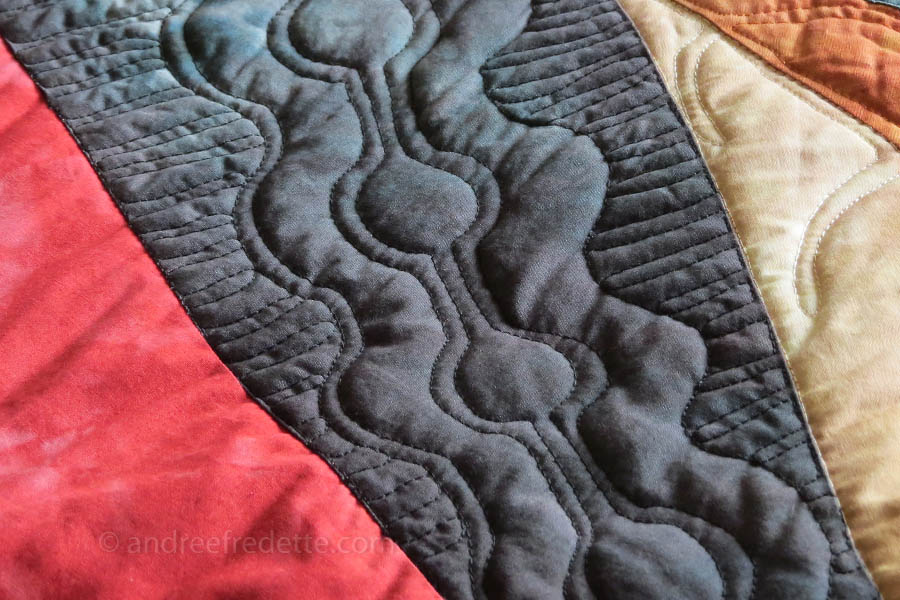
Above, this is another example of my little “corridors” or lanes, first drawn with a straight stitch (well, meandering, but straight, if you get my drift…), and then filled with a motif. I chose the curl to hint at flow, eddies of water. In this case, a piece about the desert in Australia, absent water…

It usually takes me a long time of staring at a quilt top before making a decision on exactly how I will go about texturing it. Sometimes, I will put the finished quilt top away for weeks, before bringing it out, hanging it on my work wall and taking a fresh look at it. In other cases, I know how I will proceed even before finishing the top.
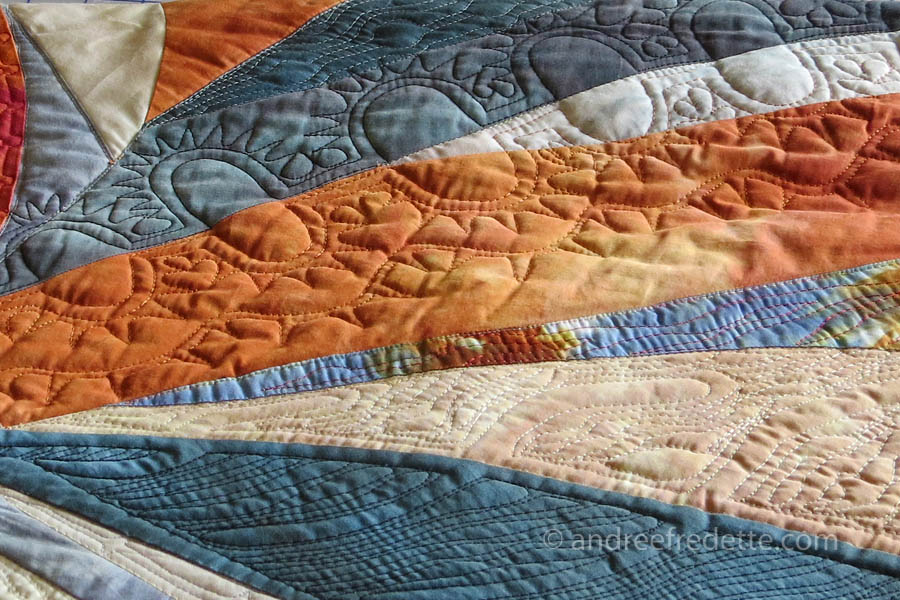
In earlier examples from Quilt and Stitch Ideas, I showed examples of how some quilts “tell me” that the quilting lines or motifs should remain within colour boundaries, within the lines.
But other quilts call for lines that flow across the whole piece. I carry the lines across those boundaries, because it feels right.

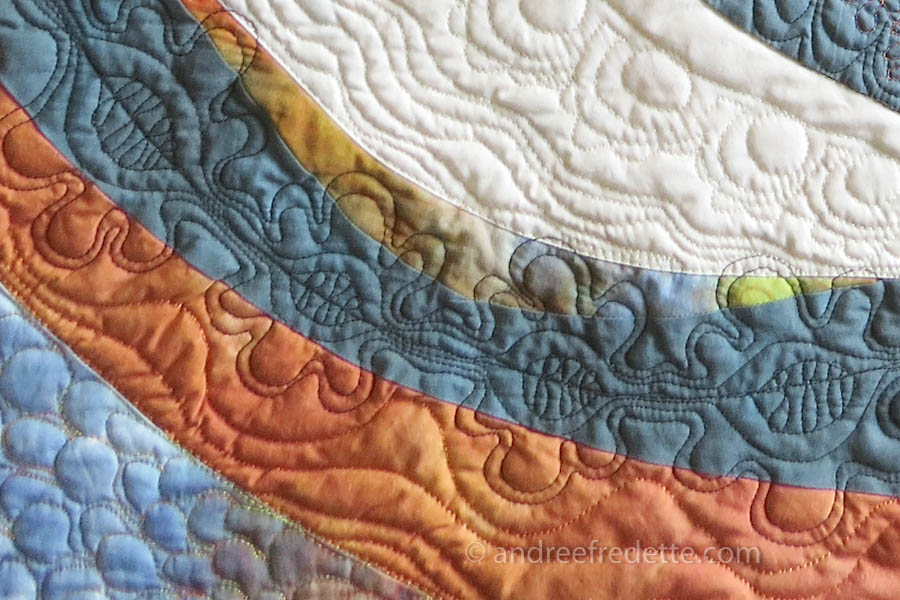
This last image shows how much fun it is to compose patterns intuitively. Looks like critters coming out of the ocean, doesn’t it?
Here is the third part of my little series (Quilt and Stitch posts One, and Two) on how I approach the quilting or texturing (or embroidery) of a quilt.
Once I create a top, or quilt surface, I spend a lot of time staring at it, trying to decide how I will add the layer of texture. Where will the lines be most effective? Does it need a lot of texture? Or restraint?

Those are hard decisions. It is sooooo easy to go overboard.

Most of the time, I follow the pieced lines (where two colours meet, for example), and texture between the lines. But there are always exceptions. Rules that need breaking…

And then, there is just the simple joy of meandering on a single piece of fabric, while changing thread colours. I have made discoveries that way! A line of black, for example (on the left, above), serves to highlight its light-coloured neighbour. Relief, in a way… On the right, above, I first placed a little pair of meandering lines in regular thread. Then I turned the piece over, and filled-in that little corridor with a “mossy stitch”, which is a tight figure-eight stitch, using a thick thread wound in my machine bobbin. Time consuming, but very zen.

Finally, another little “sketch”, a practice piece where I tried out various ideas… You can see the evolution of lines, with their accessory and filler motifs.
As a follow-up on last week’s Quilt and Stitch post One, about my approach to mark-making on textiles, a.k.a. quilting, here is another set of closeups shots to illustrate my fascination with line repeats.
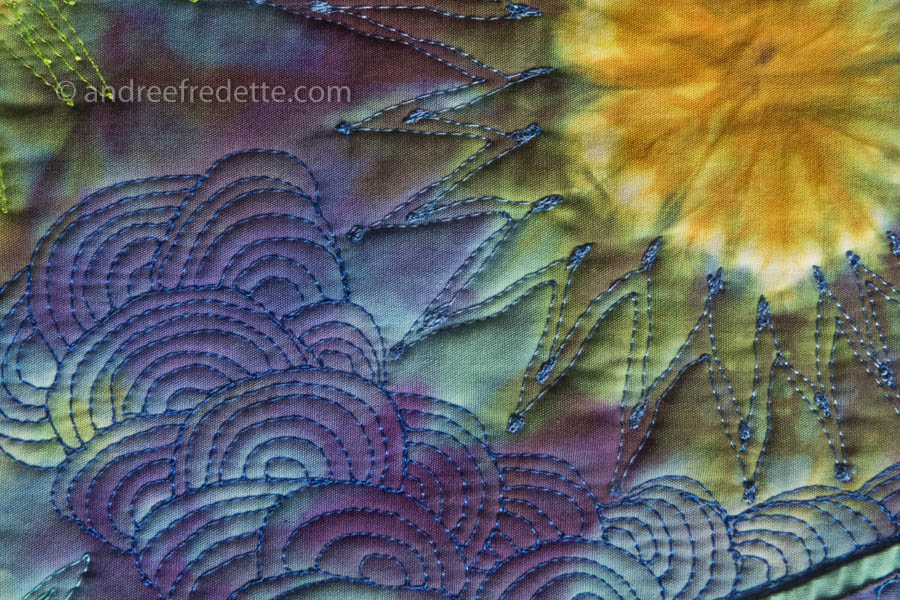
Above, two sets of very different line repeats: a curvy grouping at the bottom, contrasted with very angular paired lines around the “sun”, which are punctuated by little “seeds” of zig-zag-in-place, just because I imagined it might be interesting (smile).
The photo above is a real close-up, those stitching lines are about an 1/8″ apart, and the fabric is hand-dyed pima cotton, with a very tight weave. The sunburst effect on the hand-dye was achieved with tightly knotted elastics, a technique from the sixties… But resist dyeing, or tie-dye, is a subject for another day.
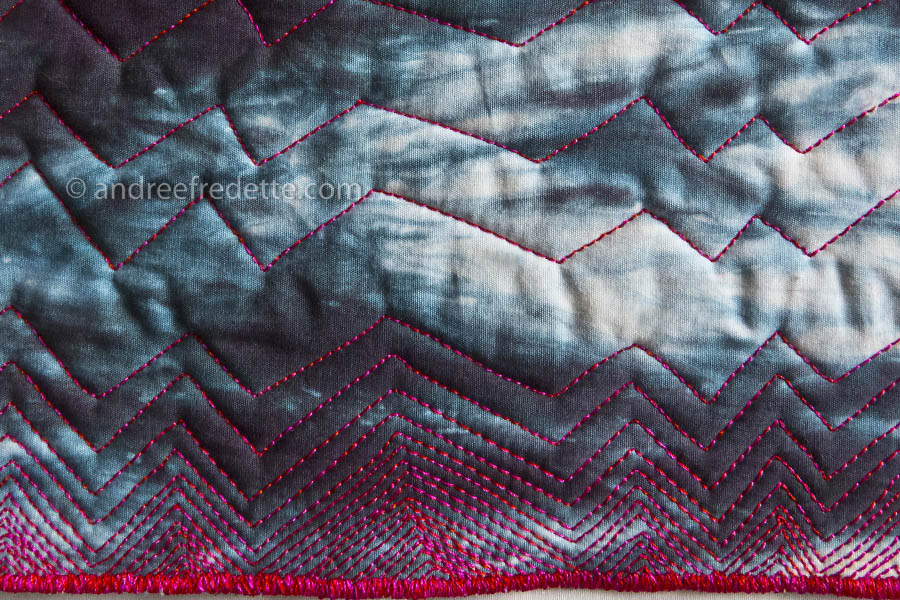
Above, another sample that shows how variations in spacing can create a vibration effect. Almost tribal. I could have changed thread colours, but chose to stay with the hot pink. In later posts on this topic, I will show you how thread colour can play a big role in a group of stitched lines.

Above: circular stitching in place, to create a little “pasty”, or embroidered dot. I left the thread on the piece between dots. For the top line of pasties, I decided to come back and to add lines of stitching to highlight the linear connection. I could have cut the threads… but it is far more interesting this way.
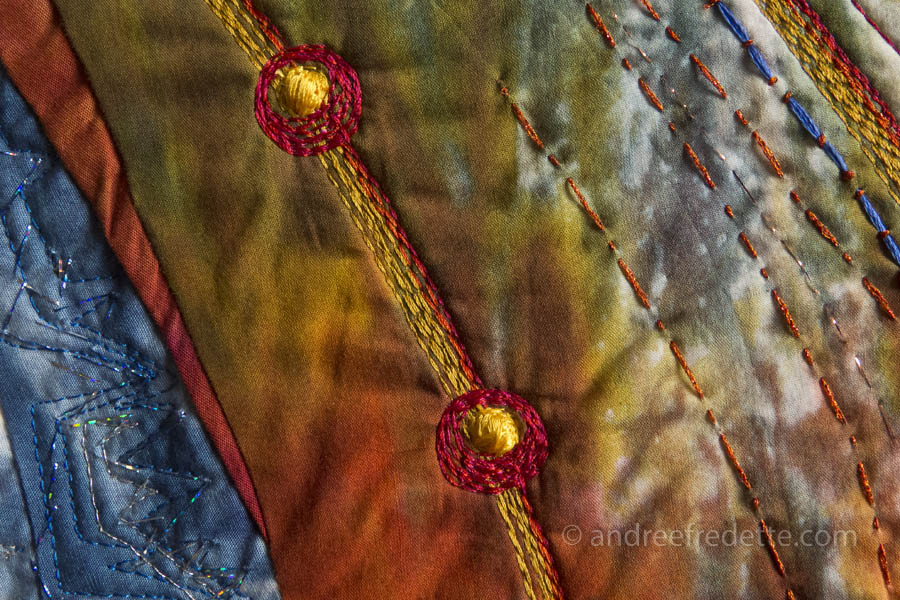
And this last example is a combo of machine and hand-stitching. I started with a line, punctuated by “pasties” which I topped with a thread buildup, to create a thread bead, practically. Then, I returned with another colour, and stitched up and down and around the pasties, because I felt like it…. The other lines on the right are stitched/embroidered by hand. You can also spot my fingernail-dragging mark on the fabric, where I had considered adding yet another line…
All in a day’s play.