Tag Archives: mark-making

Quilt and Stitch… Some ideas, Part 4

If you have read the preceding parts of this series (Quilt and Stitch posts: One, Two and Three), you know that I get my ideas from nature. A leaf pattern, a stem, wave action, water… And in this case, water, definitely.
IMG_0403

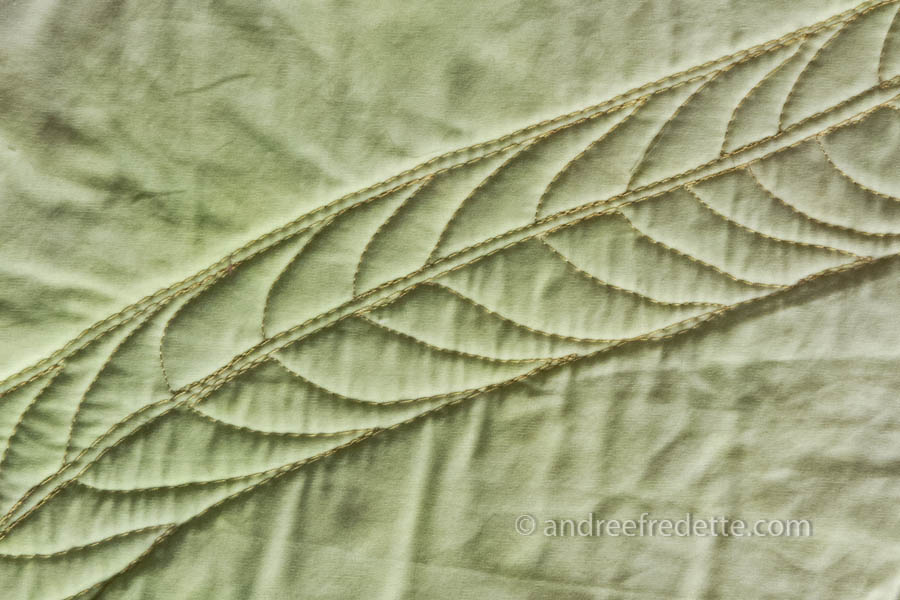
Above, this is another example of my little “corridors” or lanes, first drawn with a straight stitch (well, meandering, but straight, if you get my drift…), and then filled with a motif. I chose the curl to hint at flow, eddies of water. In this case, a piece about the desert in Australia, absent water…

Machine embroidery and quilting. Photo © Andrée Fredette

It usually takes me a long time of staring at a quilt top before making a decision on exactly how I will go about texturing it.  Sometimes, I will put the finished quilt top away for weeks, before bringing it out, hanging it on my work wall and taking a fresh look at it. In other cases, I know how I will proceed even before finishing the top.

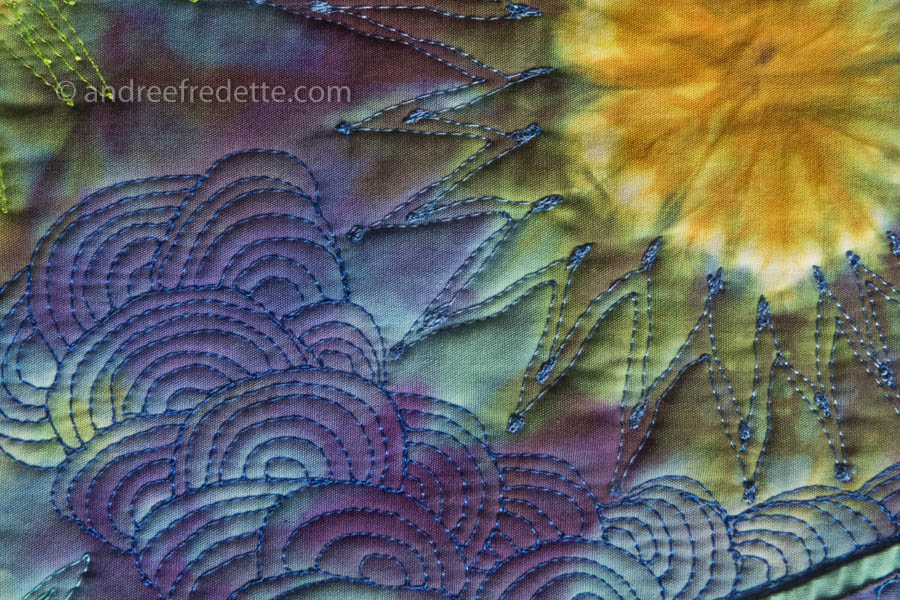
In earlier examples from Quilt and Stitch Ideas, I showed examples of how some quilts “tell me” that the quilting lines or motifs should remain within colour boundaries,  within the lines.

But other quilts call for lines that flow across the whole piece. I carry the lines across those boundaries, because it feels right.

Machine embroidery and quilting. Photo © Andrée Fredette

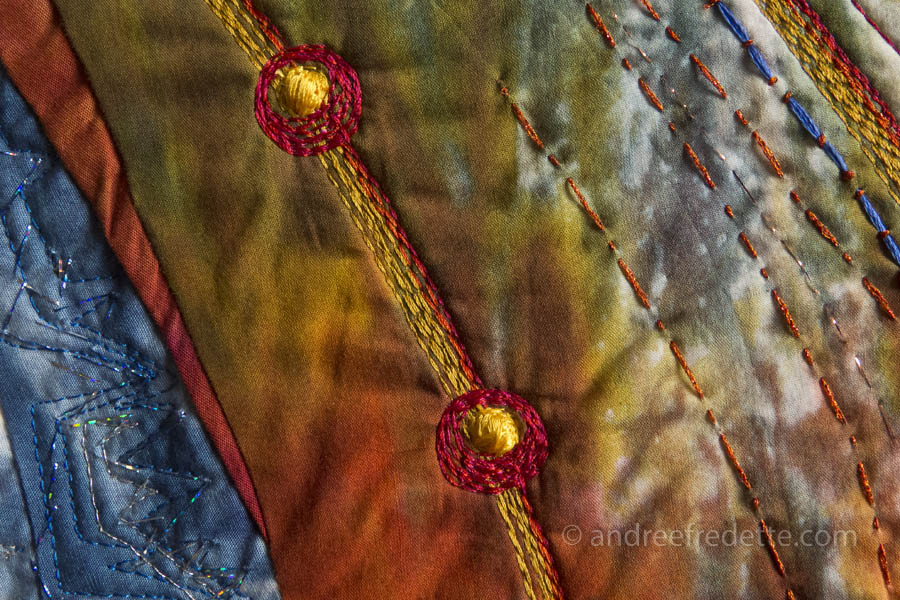
This last image shows how much fun it is to compose patterns intuitively. Looks like critters coming out of the ocean, doesn’t it?

Quilt and Stitch… Some Ideas, Part 3

Here is the third part of my little series (Quilt and Stitch posts One, and Two) on how I approach the quilting or texturing (or embroidery) of a quilt.

Once I create a top, or quilt surface, I spend a lot of time staring at it, trying to decide how I will add the layer of texture. Where will the lines be most effective? Does it need a lot of texture? Or restraint?
Stitiching-quilting sample. Photo copyright Andrée Fredette

Those are hard decisions. It is sooooo easy to go overboard.

Machine embroidery and quilting. Photo © Andrée Fredette

Most of the time, I follow the pieced lines (where two colours meet, for example), and texture between the lines. But there are always exceptions. Rules that need breaking…

IMG_0369

And then, there is just the simple joy of meandering on a single piece of fabric, while changing thread colours. I have made discoveries that way! A line of black, for example (on the left, above), serves to highlight its light-coloured neighbour. Relief, in a way… On the right, above, I first placed a little pair of meandering lines in regular thread. Then I turned the piece over, and filled-in that little corridor with a “mossy stitch”, which is a tight figure-eight stitch, using a thick thread wound in my machine bobbin. Time consuming, but very zen.

Machine embroidery and quilting. Photo © Andrée Fredette

Finally, another little “sketch”, a practice piece where I tried out various ideas… You can see the evolution of lines, with their accessory and filler motifs.

Quilt and Stitch… Some Ideas, Part 2

As a follow-up on last week’s Quilt and Stitch post One, about my approach to mark-making on textiles, a.k.a. quilting, here is another set of closeups shots to illustrate my fascination with line repeats.
Quilt stitch sample. Photo © Andrée Fredette

Above, two sets of very different line repeats: a curvy grouping at the bottom, contrasted with very angular paired lines around the “sun”, which are punctuated by little “seeds” of zig-zag-in-place, just because I imagined it might be interesting (smile).

The photo above is a real close-up, those stitching lines are about an 1/8″ apart, and the fabric is hand-dyed pima cotton, with a very tight weave. The sunburst effect on the hand-dye was achieved with tightly knotted elastics, a technique from the sixties… But resist dyeing, or tie-dye, is a subject for another day.

Quilt stitch sample. Photo © Andrée Fredette

Above, another sample that shows how variations in spacing can create a vibration effect. Almost tribal. I could have changed thread colours, but chose to stay with the hot pink. In later posts on this topic, I will show you how thread colour can play a big role in a group of stitched lines.

Quilt stitch sample. Photo © Andrée Fredette

Above: circular stitching in place, to create a little “pasty”, or embroidered dot. I left the thread on the piece between dots. For the top line of pasties, I decided to come back and to add lines of stitching to highlight the linear connection.  I could have cut the threads… but it is far more interesting this way.

IMG_0340

And this last example is a combo of machine and hand-stitching. I started with a line, punctuated by “pasties” which I topped with a thread buildup, to create a thread bead, practically. Then, I returned with another colour, and stitched up and down and around the pasties, because I felt like it…. The other lines on the right are stitched/embroidered by hand. You can also spot my fingernail-dragging mark on the fabric, where I had considered adding yet another line…

All in a day’s play.

Quilt and Stitch… Some Ideas, Part 1

Before starting to texture a quilt, I usually go through what I call my doodling step, where I try out some ideas with a felt tip pen on some newsprint. I draw lines without lifting the felt tip pen from the paper, to imitate the “endless line” motion of a sewing machine stitching line…

Stitching pattern, free-style. Photo © Andrée Fredette

Sometimes, the bright ideas are elusive and I scrap a lot of paper… And sometimes, light bulbs go on and I save my pile of paper sketches. On a good day, I can come up with several usable textures and on a bad day, well, it’s a really dry run. Go figure.

Then – before tackling an actual quilt – I take my bright ideas to little “quilt sandwiches”, to practice and warm up.

Stitching pattern, free-style. Photo © Andrée Fredette

In the sample above, you can see the light green stitching lines, about an inch apart, that form “corridors”. I often use those as a first step, to establish a direction, especially when I am trying to evoke a stem, or to draw long lines across a piece.

After laying my road map, I come back (in this case, with a darker thread) and fill in with the patterns that I pick up in the greenery that surrounds me. I am really fascinated by the lines of foliage – both on shore and in the water – on the island. Grasses, plants, kelp, anything is a good source of inspiration.

And I have found that pattern repeats, especially when they are uneven, are very interesting. They move the eye around…

Stitching pattern, free-style. Photo © Andrée Fredette

Here is an example of a textured quilt study, using simple lines to enhance the pieced design.

Mark-making. Stitching pattern, free-style. Photo © Andrée Fredette

I am not interested in perfection, because perfectly spaced lines and stitches look too automated, machine-driven. I prefer the lyrical “élan”, the irregular repeats, much like wavelets washing ashore, no two exactly the same. I want my stitching or mark-making to look a bit more like someone applying pressure on a brush, while painting or drawing. Because I draw with a sewing machine…

Work in progress: texturing stage

My latest quilt is Jungle… and it’s a jungle of stitches out there! I have been putting in the hours for the past two weeks, both on this big one and the smaller companion quilt.

Work is progressing, which is good. I am adding a layer of much more intense texture into this piece than I had planned. Guess I am incorrigible.It’s going to be an interesting piece to look at, once I block it on my work wall.

In the meantime, here is a shot of the beast, in the process.
Work in progress, Jungle, quilt by Andrée Fredette, September 2013
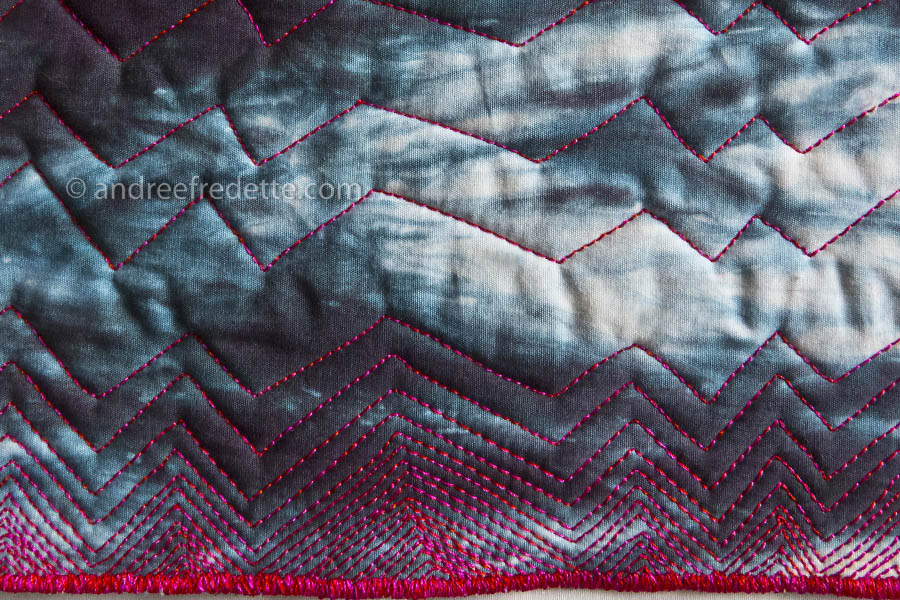
Much of the quilting is improvised and I draw inspiration from the colours and the shapes. This quilt is so graphic, with bright contrast, that I decided to stick with “stitching within the lines” rather than add another set of markings by going “off-road”. I think it would have been too chaotic.  Well, it’s how I feel at the moment and this may change in the next couple of days (smile). People who quilt will understand what I am talking about!

And to give a better idea of the texture, here is a picture of the back.
Back view, work in progress, quilt by Andrée Fredette, September 2013Still much more work to be done, one hour at a time. And of course, all the finishing.

Did I mention that I plan to finish this beast by Saturday? Better get going…